
Creating Holiday Magic with Simran
December 15, 2020
The holidays are finally here! With Thanksgiving passed, Christmas is right around the corner. The lights are finally starting to twinkle at night in each neighborhood. Each store is beginning to get their Holiday decorations out as well. The feeling of walking in with Christmas songs playing in the background helps remind us that there are positives even with our current pandemic. Also, with the chilly weather coming in, here are a few things that can be attempted to be done at home:
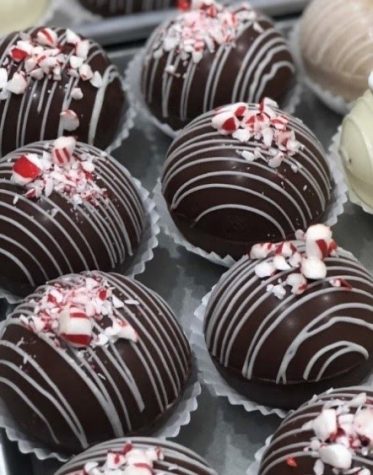
The first is a Holiday recipe to make an item that has been coming into the spotlight lately. These aesthetic looking sweets are known as Hot Chocolate Bombs. They are small, circular spheres of chocolate filled with hot cocoa powder and marshmallows that gives hot chocolate both a new and fun look! From being seen already made in stores to online trending on Instagram, here are 10 easy steps to making them at home:
Ingredients:
– 2 Silicone half-ball sphere molds
– 1 Muffin Tray
– 1 Box of Nestle Hot Cocoa Mix, individual packets
– 1 Pack of Jet-puffed miniature marshmallows, 10 oz
– 2 Packs of Ghirardelli semi-sweet grand chips, 11 oz
– Food safe paintbrush
– 1 Pack of Ghirardelli white chocolate chips, 11 oz
– 1 Box of Peppermint candy canes (optional)
Steps:
- Place one bag of Ghirardelli semi-sweet grand chips into a bowl and microwave in intervals of 15 seconds while stirring after each. This should be done until a melted, but thick consistency is reached.
- Place about a teaspoon of the melted chocolate depending on your mold into the silicone molds. Use the paintbrush to spread the chocolate evenly and fill in any holes.
- Place the silicone molds in the fridge for about 20 minutes and while waiting repeat step 1 using the second bag of chocolate.
- After 20 minutes, with the paintbrush, use the second bowl of melted chocolate to fill any holes.
- Set the silicone molds in the freezer for about 10 minutes or until solid.
- Take the silicone molds out of the freezer and push the chocolate shells out of the molds. Put about half of one hot cocoa packet into half of the chocolate spheres along with a few marshmallows.
- Warm up the left-over chocolate once again in intervals of 15 seconds. With the paintbrush, use this chocolate to glue an empty cholate shell with a shell that is filled with the hot cocoa powder and marshmallows.
- Lay them in a muffin tray and place them in the fridge for about 10 minutes for the melted chocolate to become solid. Take two candy canes and crush them in a bowl. Then pour the bag of Ghirardelli white chocolate chips into a bowl and microwave in intervals of 15 seconds while stirring between each.
- Take the tray out of the freezer, drizzle the melted white chocolate on top and sprinkle some crushed candy cane pieces.
- Lastly, enjoy by stirring the hot cocoa bomb in a cup with some warm milk. For storage keep in an airtight container and place in the fridge.
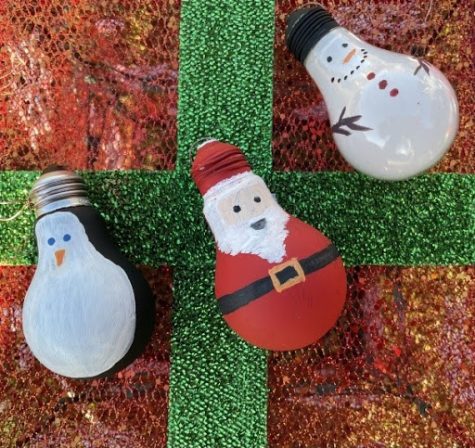
Now, that we have those down here is a DIY Holiday decoration. These Christmas lightbulb decorations are perfect for using materials laying around the house to create some new ornaments. While currently being at home for the majority of the time, this can be the perfect activity to do with others. A great idea is to maybe turn this into a competition where once they are completed, you can judge who’s turned out the best!
Materials:
– 3 lightbulbs
– 1 Pack of acrylic paint
– 1 Pack of various paint brushes
– 1 Thin Wire
– Scissors
Steps:
1. Cut three pieces of about 4-inch wire and then wrap it around each of the lightbulbs. Paint one lightbulb red, one white, and one black. Then leave it to dry.
2. Use a thin paintbrush and black paint to do the eyes and smile of the snowman on the white lightbulb. Next, do the nose with orange by slightly stroking your paintbrush to the right and use red to draw three dots going down as the buttons. Lastly, use brown to draw a line on each side of the snowman for its arms.
3. Take the black lightbulb and paint the center of the front with white paint. Once dry, use blue paint to draw the eyes, and using orange gently stroke your paintbrush down drawing the beak.
4. Take the remaining lightbulb and paint a line in black around the bottom half. Continue by painting a rectangle at the top half of the lightbulb a skin tone color. Then use a paintbrush to pat on the white paint for the beard. Once dry, use black paint to draw on the eyes and smile. Lastly, use yellow paint to draw a square on the black line as a buckle.
5. Now, once they have all dried take the snowman and paint the top in black paint for the hat. Take the Santa and paint the top of the lightbulb in red paint for the hat.
Now, that you have your recipe and decorations completed; you can enjoy them as well as share them with others. These will definitely impress those around you.
Have a happy holiday!